Clone the repositories #
QuestCrafts source code sits in two main repos, the XR Wrapper and Pojlib (QuestCrafts core). Obviously, to work with the code, you have to have a copy of it. We recommend you make a GitHub account and fork the repos; however, for this documentation, we'll assume that you only want to make personal changes.
Make sure that you have Git installed on your computer already, and then open a new terminal in the location where you would like the project files stored. Then run the commands below:
git clone https://github.com/QuestCraftPlusPlus/QCXR-XR-Wrapper.git
git clone https://github.com/QuestCraftPlusPlus/Pojlib.git
Build the QuestCraft core (Pojlib) #
Before we get into the VR part of QuestCraft, you first need to build the core library (Pojlib) which is used to interact with Minecraft and the other components of QuestCraft.
In order to build Pojlib, you will need to install Android Studio. After you install Android Studio, you can open the project by dragging the Pojlib folder into the project selector (first menu when you open the software), now wait patently for the build menu (pictured below) to say BUILD SUCCESSFUL.
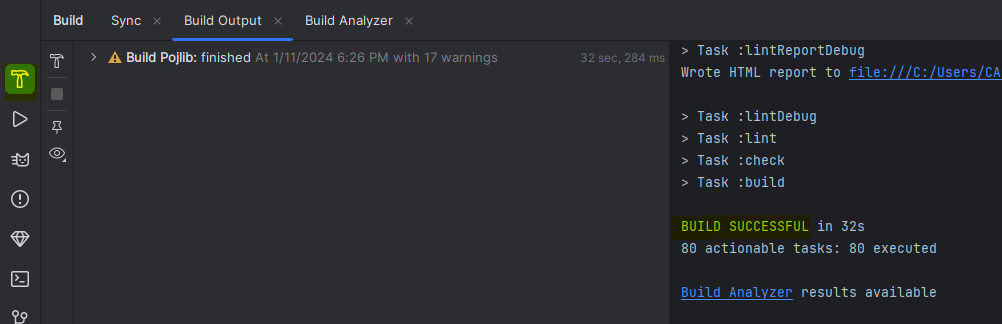
Now that the project has finished loading, you can click the green hammer at the top right of the screen to begin the build process. Once the build has finished and succeeded, you should be able to see two files inside the output folder (build/outputs/aar/). Keep these files here for now, we'll need them later.
Build the QuestCraft wrapper #
Now that you have built Pojlib, we can continue onto the VR part. For this, you'll need to install Unity 2021.3.33f1 or higher, you can install it by using the Unity Hub. Make sure you select the Android Build Support module when prompted! Once you have installed Unity, click the Add button in the projects menu and select the QCXR-XR-Wrapper folder, then open the project and accept any prompts that appear.
You should now see the QuestCraft wrapper environment, alongside a few folders shown at the bottom of your screen. Navigate to the Android plugins folder (Plugins/Android/), then drag and drop one of the AAR files from earlier into the folder, either file is fine.
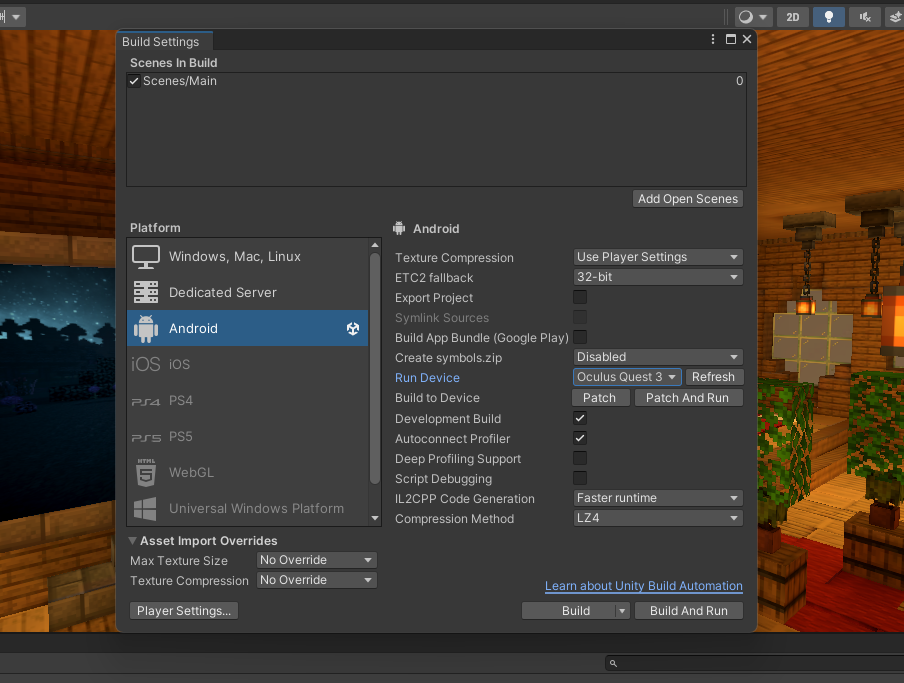
We're almost there! You can now connect your headset to your computer, make sure to accept the ADB prompt inside the headset. Next, open the build menu (pictured below) by clicking the File button at the top of the screen and then selecting Build Settings, now select Android as the build target and select your headset inside the Run Device dropdown, then click Build and Run.
And that's it, you're done! If you get a prompt saying that the Android SDK is out of date, click the update button and wait for the process to finish, then try again, otherwise if your build finished successfully, you should now see QuestCraft loading on your headset.
What's next? #
Now that you have your own QuestCraft development environment, you can start making your own changes, or you can continue reading through the docs for guides on how to do things like making your own environment. If you need some help or have something you would like to ask, you can join our Discord @ discord.gg/QuestCraft.